Chassis
Clutch Pedal Free Play
Leaf Spring Lubrication
Newly Painted Wheels
Old Wheels
Rear Axle Thread Repair
Shock Absorber Servicing
Speedometer Repairs
Tyre Mounting
Tyre Changing
Wheel Cleaning
Wheel Nuts
Clutch Pedal Free Play
You don’t want to drive your car without any free movement or play in the clutch pedal before it starts to disengage the clutch. The clutch pedal must have at least 1” free movement or play at all times. As the clutch facings wear, this play gradually becomes less, and, if not adjusted back out, will result in clutch slippage and a burned-out clutch.
The free play is adjusted by removing the clevis pin on the clutch actuating arm, below the clutch pedal. Screw the clevis rod out to increase pedal movement, to compensate for wear. Replace clevis pin and cotter pin.
Make checking the clutch pedal clearance and adjustment (when needed) a part of your routine maintenance checklist, and have a Model A Day!

Jm Cannon, Western Model A News June 2020
Top of page
Tyre Mounting
Start with the tyre and valve stem at the top of the wheel.
(A) Working both ways from the valve stem, press the casing together and down into the rim well – use tyre iron if necessary. (B) With tyre completely on the rim, raise tyre up (C) until it is centred on the rim and beads seated., then shake the tyre vigorously to clear any folds or creases out of the lightly inflated tube. Inflate to about 35 pounds (D), tighten nut on the valve stem, then deflate so the tube can settle to a permanent, uniform position and inflate again to 35 pounds.

Re-printed from Western Model A News, Aug 1994
Top of page
Tyre Changing
When fitting tyres to your Model A, work from the back of the wheel to save chipping the front where it is seen! You need to work on a soft lawn or similar so as not to damage the hub cap. It is best to use a tyre lever which is flat and doesn’t have the raised reinforcing edges. You can also place a piece of cloth on the lever where it could damage the paint. Unless a tyre is old and hard, you only need levers to start (two or three positions should be sufficient to get it started, and lift the rest by hand) a rubber mallet will put it on without using levers.
Alan Jeffree, Western Model A News Jan 2012
Top of page
Newly Painted Wheels
If you have a newly painted or powder coated Model A wheel, it is important to remove the coating from inside the stud hole taper. If this is not done the wheel will not stay tight and you could lose a wheel while driving. Before installing a newly coated wheel, place the wheel on a flat surface and use an old wheel nut and a rattle gun into each taper until the coating is taken off. It will only take a few seconds on each of the five tapered holes. Even after doing this it is important to double check each wheel for tightness if a wheel has been removed for any reason!
Alan Jeffree, Western Model A News Dec 2011
Top of page
Old Wheels
To assess a rusty old Model A wheel:
Before purchasing a wheel which may be usable (or it may be scrap!), visually check it for rust, elongated stud holes, broken or missing spokes, and welds. Most bent spokes can be straightened as long as they aren’t severe.
The main problem with them after passing the above checks, is being buckled. I close one eye and look down the inside rim from top to bottom. You can’t do this on the outer edge as the spokes and hub cap tunnel are in your vision. If you can see all of the outer edge in one plane, it is okay. If you can not line up the whole outer edge, it is buckled. A couple of mm out of line, the wheel is still usable – depending on how desperate you are for a wheel.
The wheel could also be egg-shaped and the only way to test for this is to spin it on a hub. If a wheel passes the above tests, I would take a chance on it. Not very many wheels I have seen have been egged-shaped.
Alan Jeffree, Western Model A News Sept 2012
Top of page
Wheel Cleaning
Here is a very simple and easy way to clean spoked wheels. Buy a good brand of “foam
bathroom cleaner” to spray on your wheels. After spraying, wait a few minutes to let the
cleaner soak in and to penetrate the dirt. Rinse off with a garden hose and you should have clean and shiny wheels!
Ray Mahony, Western Model A News June 2013
Top of page
Wheel Nuts
When you have had a Model A wheel off, tighten all the wheel nuts just snug then work in a pattern, starting at any one then go to the one opposite and proceed using opposites as you go. This avoids the risk of distorting the drums. Recheck them all in a round sequence once tight.
Each time you have a Model A wheel off follow the above sequence, then recheck all wheel nuts after doing a few miles. It was quite common in “their day” to shed a wheel while driving. You would be surprised how many Model A backing plates I have seen and the bottom inch has been ground off from losing a wheel and the brake drum has skidded along the road!!
A reminder – if you have newly painted or powder coated wheels take the coating in the wheel nut holes/chamfers off before fitting the wheel (refer to my tip of Dec 2011 Newly Painted Wheels).
Alan Jeffree, Western Model A News Dec 2012
Top of page
Rear Axle Thread Repair
Considering the age of our vehicles, it is not uncommon for the 5/8 inch UNF 18 TPI threads on the rear axles to become badly worn. Even with a new nut, if it cannot be tensioned to the specified amount of 100 foot/pounds, then the correct way to fix the problems is to fit a new axle.
After removing the hub check the condition of the axle taper, key way and key. Also check the internal taper within the hub. It is the taper fit that does the work as demonstrated by the force normally required to remove the hub. If these components are in good condition then the following techniques have been used to repair the axle thread in situ.
- The root diameter of the original 5/8 thread is approximately 9/16 inch. Carefully file the axle thread so that the diameter is 9/16 inch. The footprint of the original thread may be visible. With a 9/16 inch UNF die which is also 18TPI, cut a new thread. Fit a new 9/16 inch nut and tension to 90 foot/pounds. This reduced diameter will be satisfactory as mentioned previously; it is the taper lock that does the work.
- This method requires careful alignment and attention to detail. Using the centre bore in the end of the axle, drill a pilot hole using say a 1/4 inch drill the full length of the axle thread and into the taper section for approximately one inch. Drill a second pilot hole using a 3/8 inch drill. Cut off the damaged axle section. Enlarge the pilot hole to the correct size for a 5/8 inch UNF tap and cut the internal thread.
Finally screw a high tensile 5/8 inch bolt with sufficient thread to go into the axle and long enough to match the original axle length. Use Loctite or similar compound and the head of the bolt to ensure it is dead tight. Cut off the new bolt to the required axle length. - Weld up the damaged axle thread and dress by filing to enable sufficient metal to cut an adequate 5/8 inch UNF thread. Fit a new nut.
The above techniques are only repairs. Why not have some fun and remove the differential and fit a mechanical sound axle.
John Moorehead, Western Model A News Nov 2017
Top of page
Shock Absorber Servicing
Do not forget to check and service the original Model A shock absorbers. Ford recommended the fluid and needle valve setting be checked every 5000 miles.
The Model A ‘Houdaille” double acting shock absorbers operate on the principle of hydraulic resistance. Shock absorber fluid is forced from one chamber to another by the movement of the lever arm. The needle valve setting is important to control the rate of flow between chambers. Originally the fluid used was 90% glycerine and 10% alcohol to prove the required viscosity. A suitable fluid is available from Veteran, Vintage, Classic Lubricants (Penrite) and Model A Parts suppliers.
The shock absorber fluid should be replaced and filled to approximately ¼ inch below the filler plug. Average setting of the needle valve is between is achieved by opening the valve (anti-clockwise) approximately one quarter and three eights of a turn off the closed position. This is only an initial setting and by screwing the needle out further will provide a softer ride.
It is important to clean the components of the tubular shock links used between the lever arm and the chassis. The internal parts should be greased regularly.
In later years Ford used an alternative shock link commonly called a “dog bone “which incorporate rubber balls for movement. This design is often used in lieu of the original tubular unit. A light coating of graphite powder can be applied to the rubber components for lubrication.
John Moorehead, Western Model A News Oct 2017
Top of page
Speedometer Repairs
REPAIR AND MAINTENANCE OF STEWART WARNER MODEL A
OVAL SPEEDOMETER
On the last MARC run to Gin Gin I noticed that the odometer was not working. The drive cable was sound as the speedometer drum was indicating correctly (well almost!!).
Whilst there are numerous articles/instructions for the dismantling and repair of the Model A speedometer, I decided to contact an instrument firm that I have used in the past for motor cycle chronometric speedometers. My contact said “ no problems” and they are familiar with the Model A units.
A few days later after replacing some bushes and general maintenance, the unit was returned and at a reasonable cost. The speedometer works well and the speed indicating drum is surprisingly steady.
My contact is Aisat Instruments, Welshpool and can be contacted on (08) 9350 5545 and I would certainly recommend this company.
John Moorehead, Western Model A News July 2016
PS. Ian Steer has also used Aisat with success.
Top of page
Leaf Spring Lubrication
Over many years of working on Model A Fords we’ve tried numerous solutions to lubricating the springs. The spring is an important component in the Model A. It allows the wheels to handle bumps and road imperfections without severely jarring the occupants of the car.
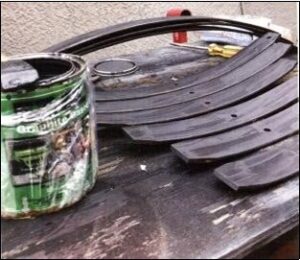
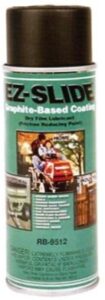
Well, getting the spring leaves to slide easily is a challenge. They are under a great deal of pressure once installed on the axles. We have used grease (very much a mess), tried Teflon tape, again not too effective. A few years ago we heard of a graphite infused paint called EZ Slide. This product is sold in Tractor Supply locations and is used on various pieces of farm equipment. It is manufactured by Van Sickle paint manufacturing.
EZ-SLIDE® is a graphite alkyd based lubricating paint that bonds quickly to any clean metal, wood, concrete and most plastic surfaces.
Western Model A News December 2020 (courtesy Script ‘A’ News, January 2020)